TRIBOLABORATORY
PROJECT BG05M2OP001-1.001-0008 | NATIONAL CENTER OF MECHATRONICS AND CLEAN TECHNOLOGIES
Manager: Assoc. Prof. Dr. Lilyana Kolaklieva, Central Laboratory of Applied Physics at the Bulgarian Academy of Sciences, Plovdiv
Contacts
e-mail: ohmic@mbox.digsys.bg
tel:. + 359-893-611-033
Tribolaboratory is a research laboratory of the Central Laboratory of Applied Physics with main activity – research and analysis of different types of bulk materials and thin-layer coatings, developed by various methods of deposition: physical (PVD), chemical (CVD), electrochemical, etc. Potential partners and clients of the laboratory can be research teams from the country and abroad with similar scientific interests, as well as industrial enterprises.
ACTIVITIES
- Development of methods for tribometric studies of monolayer and multilayer hard and superhard PVD coatings, deposited on substrates of various types of materials.
-
Conducting tests in different operating modes - dry static and kinetic friction, abrasive wear, erosion:
-Tests for scratching (Scratch) and wear (Slow Linear Wear) of monolayer and multilayer coatings at room temperature.
-Dry ball-on-plate and pin-on-plate testing and testing in the environment of lubricants of multilayer hard and superhard coatings. Defined parameters: Coefficient of friction; Wear resistance; Wear coefficient.
-In-situ study of wear resistance of multilayer hard and superhard coatings in heat treatments in the temperature range 25-1000oС. - Determination of thickness of monolayer and multilayer PVD coatings deposited on substrates of various types of materials.
- Determination of wear rate of PVD coatings - by combining Tribotest and Calotest methods.
- Processing and analysis of experimental results.
- Preparation of protocols and reports.
SERVICES
- Determination of thickness of monolayer and multilayer CVD coatings, anodic oxidized layers, chemical and galvanic coatings, polymers, paints and varnishes deposited on substrates of various types of materials.
- Dry testing ball-on-plate and testing in the environment of lubricants – via the reciprocating linear motion module.
- Temperature tests in the range of 25-1000oС of materials exposed to significant heat loads during operation – via the rotary motion module, in the temperature chamber.
- Investigation of materials that are exposed to sliding during operation – via the rotational motion module at speeds from 0.1 rpm to 5000 rpm.
EQUIPMENT
The laboratory infrastructure includes two apparatus for testing mechanical and tribological properties of different types of bulk materials and thin-layerеd coatings: “Precision multifunctional tribometer for micromechanical friction and wear tests in a wide temperature range” and “Calotester for thickness measurement”, which fully cover the requirements of standardized test methods.
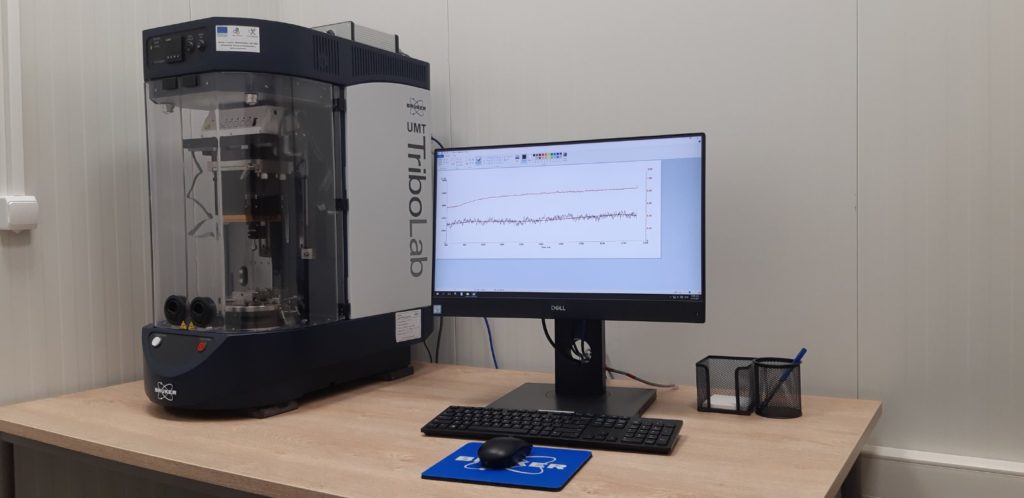
UMT TRIBOLAB (BRUKER) TRIBOMETER
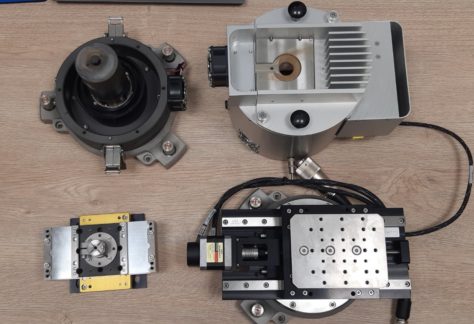
The tribometer is the only equipment in Bulgaria, constructed on a modular principle, for testing in conditions, corresponding to the real operation mode in a wide temperature range (up to 1000oС). It is fast, sensitive, with high torque and provides force measurements of high accuracy (± 1µN). The load force range is from 1 to 2000 N. The linear module allows precise linear movement and positioning to perform adhesion and wear tests, and hardness measurements. The reciprocating module is designed both for dry testing and for testing in a lubricant environment. The removable temperature chamber to the rotary drive module provides research in the temperature range 25-1000oС. The tribometer is connected to a computer. Specialized branded software is used for system management, data collection and processing.
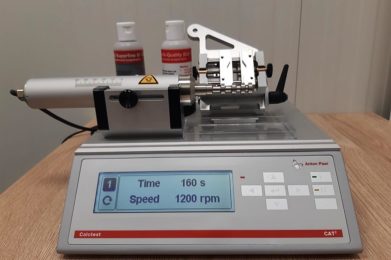
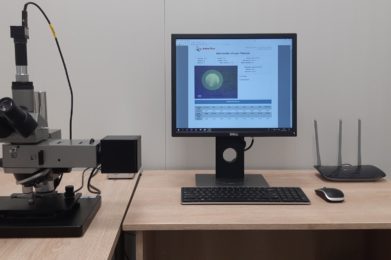
CAT2 (ANTON PAAR) CALOTESTER
The calotester is intended for express determination of thickness of monolayer and multilayer coatings in the range of 0.1 µm to 50 µm by forming a spherical crater through the coating and in the base material by means of a rotating steel ball and abrasive suspension. The thickness of the coating is calculated automatically from the diameters of the resulting circles and the diameter of the grinding ball. The equipment consists of three modules: an automated desktop device; an optical microscope with two objectives and a CCD camera, and a computer with specialized video software for measuring thickness and recording the results. The available analysis software processes various types of samples (flat, spherical and cylindrical).
